1998 Corolla Rack and Pinion DIY

wpo

New Member
#1
DIY of PWR steering Rack N pinion project. Some suggest dropping the subframe partially, some suggest remove subframe completely! Both way I have experience PROs and Cons! Details info and Pics will be posted for update!

Tools for DIY:
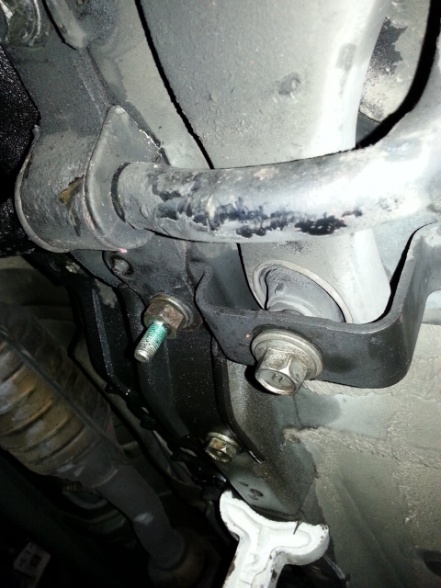
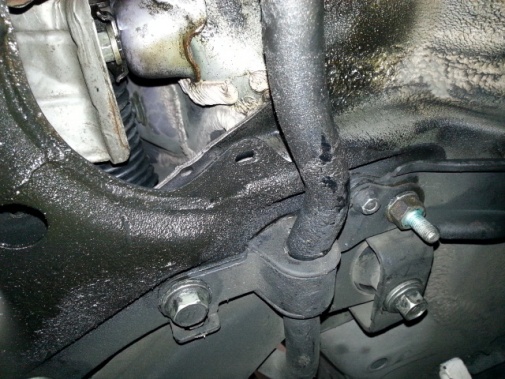
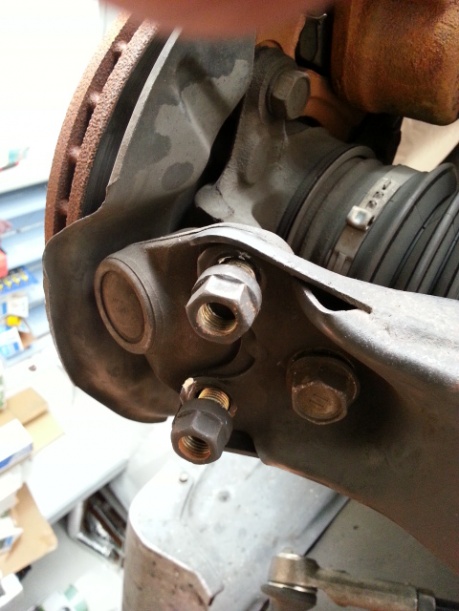
10, 12, 14, 17, 19mm sockets, wrench, and all size extension
1/4", 3/8" ,1/2" ratchet and 1/2" toque wrench (up to 200 ft lbs)
1/2" impact gun (remcomment) and 3/8" air ratchet (optional)
17mm & 19mm impact socket
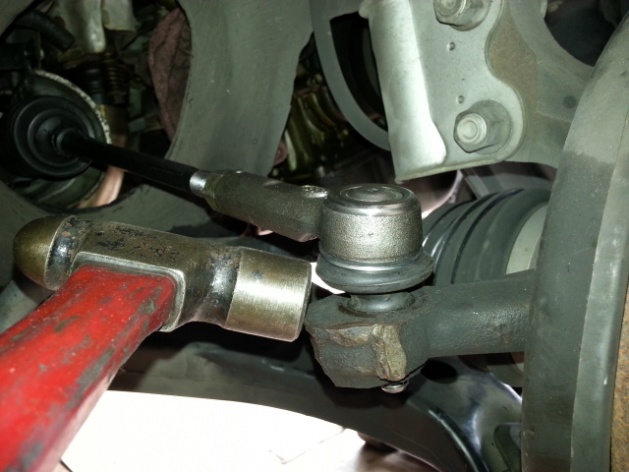
Specialty wrench (17mm flare nut wrench or crowfoot socket)
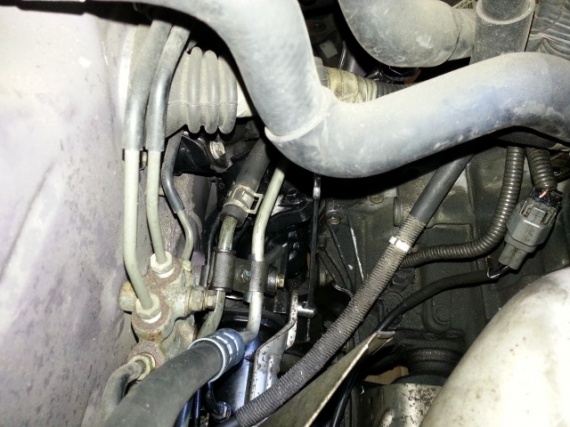
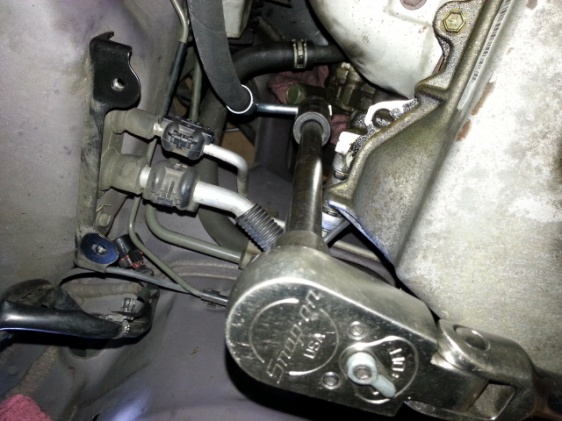
22mm deep socket ( power
steering pressure line switch)
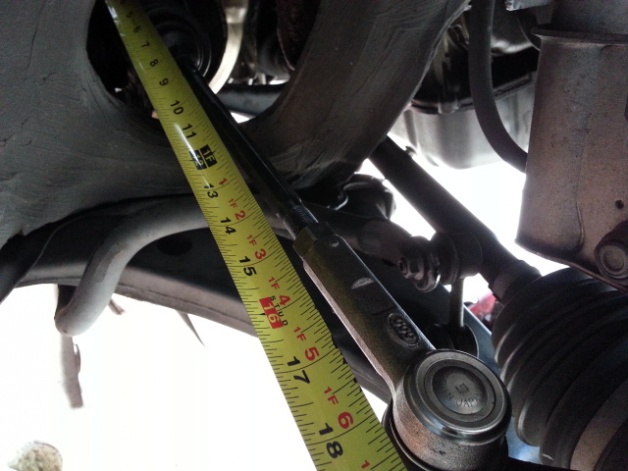
measure tape and whtie out for reference marking
1/2 qt power steering fluid or Dexron ATF

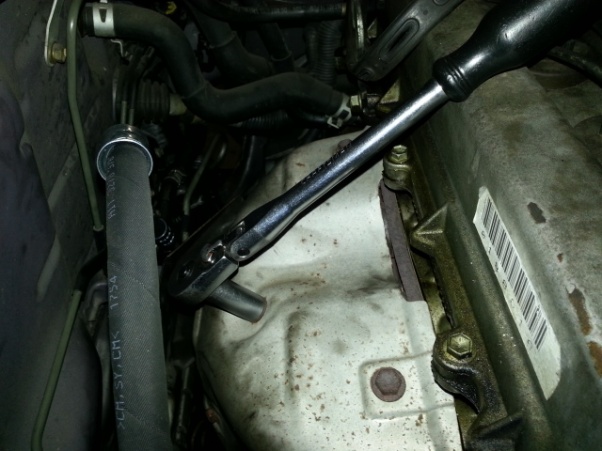
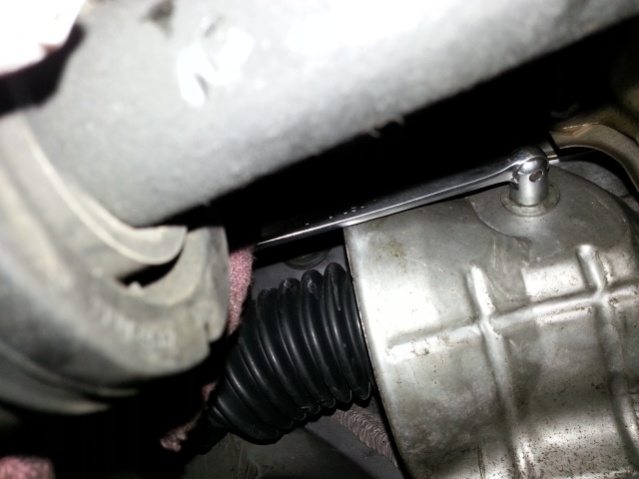
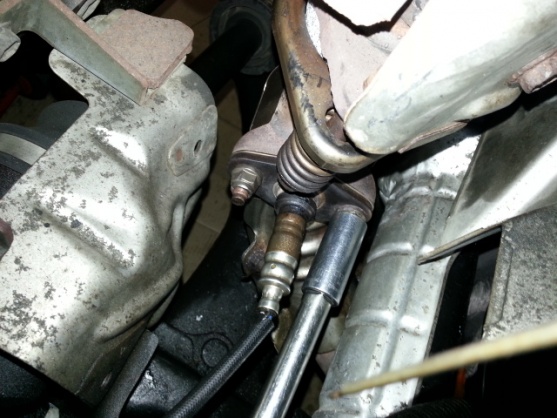
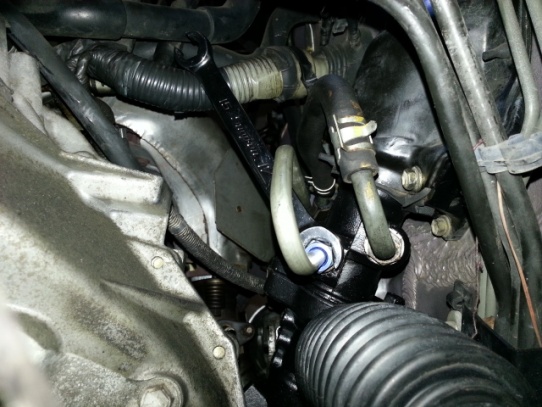
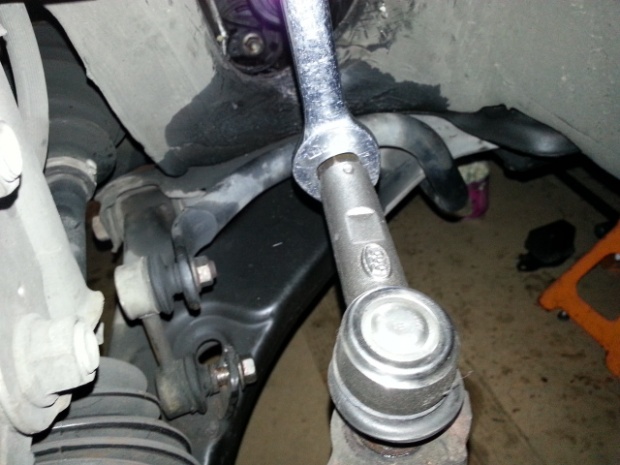
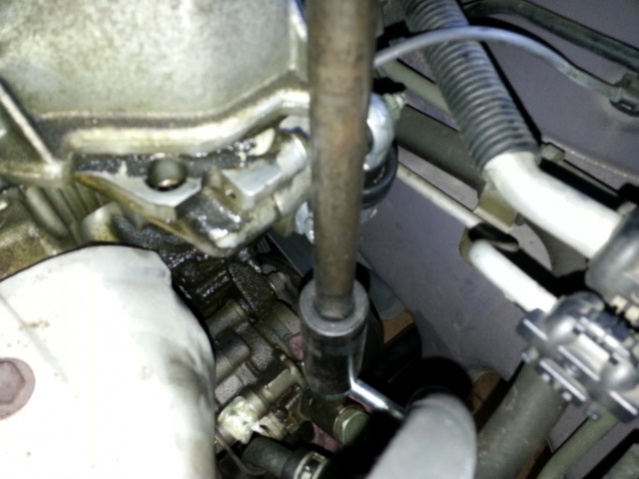
Loosen the power steering pressure line to drain the fluid with 22mm deep socket!
 

Attachments

Last edited:

wpo

New Member
#4
loosen the both pipe thread at rack assembly with a crowfoot socket or flare nut wrench (17mm). Unthread the left piple first to remove completlely, then the right side pipe which can manage to flex along away from the rack assembly. Drain the remaining fluid into container. Jack up the car and put on the inside support as you need to get access to the heavy subframe craddle. SAFETY FIRST all the time!

Here is the option you can either remove subframe out the way completely or partially depend how comfortable your work space and time to tackle the job! Some online resource suggest get it out of the way be more easy inorder to remove the steering rack! But as I progress for the removal, I found out i just need to drop subframe partially enough inorder just to get loosen ( 1 single 17mm PWR STEERING RACK MOUNTING BRAKET on DRIVER SIDE) hold the assembly!
BTW, remove the supporting bar with 2 nuts(14mm) and this funning looking thing next to REAR ENGINE MOUNT with (12mm bolts) can access from the top with a swivel 12mm and extension and the one from underneath with box end wrench! Disregard this step if decide to completely remove Subframe!!!
 

Attachments

Last edited:

wpo

New Member
#5
Before dropping the Subframe, CENTER the STEERING WHEEL with seat belt!
I reommend ALIGNMENT anyway after the job done, but do the best to get eveything line up as usuall!

Loosen the Adjusting nut on the both OUTER TIE ROD First just a few turns then tighten again with finger! Count the exposed thread on both side for installation for TOE setting refernece.

Remove the both Lower Ball Joint with 2 (17mm) nuts 1 bolts
Remove the sway bar end links (14mm) bolt
Now dropping the Subframe, these 19mm bolts are HIGH TORQUE SPEC (139-167 ft lb)
recommend the use of AIR IMPACT to ease the removal! alternately loosen little at time
 

Attachments

wpo

New Member
#6
unbolt the rear engine monuts bolt underneath (3 boltd) and through driverside wheel well (17mm bolt). Now the mount is able to tilt and wiggle, but not able remove completely since only need few inches of dropping subframe and clearence to loosen the RACK mounting bolt i have mentioned!! Just tilt the mount around and able to manage the bolt out completlely without SUBFRAME REMOVAL! Just be patient and WORKS!!
 

Attachments

#7
Don't forget to immediately do a four-wheel alignment on the car after this work is completed, or excessive tire wear can occur that will shorten the life of the tires, reduce fuel economy and also reduce safe handling.
 
Top